Some Samples of My Work
All of the photos below are actual remodels or new builds that I have done...
Major Bathroom Renovation
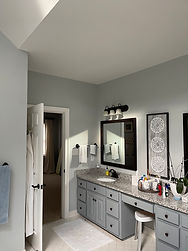
This project involved creating 2 full bathrooms out of 2 half baths (sink and toilet only) that were connected by a single shower room. I fully gutted the space, added plumbing for a second shower, built the wall between them, and tiled & trimmed it all in.


More Bathroom Remodels
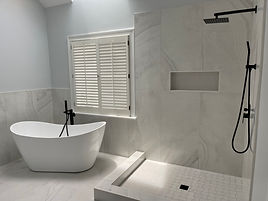
This customer wanted to get rid of the built in tub and modernize the rest of the tile. This large tile, soaking tub, and vessel sinks were a great update (note that the shower glass is not yet installed in the photo).


Before...


After...

This shower was old and needed to be replaced.


Before...
After...
In this case, the existing tub was a classic cast iron bathtub. So we just refinished the tub and installed this handmade Italian tile in a herringbone pattern.


Before...


After...
For this bathroom, we removed the old tub, gutted the entire bathroom, and built a new walk in shower with a new quartz topped vanity.
Before...


After...
The tile in this shower was not properly installed so there was considerable water damage. The customer had a tight budget, so we kept the tub but replaced the tile and vanity.
Before...


After...


Quality is Critical
After removing the old tile in this bathroom, I discovered the reason the old tile floor had cracked down the center. The joists were badly misaligned so there was almost 1-1/2" of variation in the subfloor. That's unacceptable for tiling. So, I removed the old subfloor, shimmed the joists, and replaced the subfloor. Now we have a very flat subfloor that is appropriate for a quality tile installation.


I also use the Schluter system which is state of the art tile technology. I am a certified Schluter installer and I trust this company to provide the highest quality tile foundation for my clients. Learn more about Schluter and their lifetime warranty at www.schluter.com.


Attic Buildout
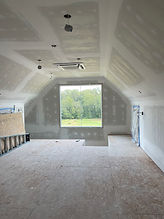
This large attic space was ultimately turned into an apartment with a living room, bedroom, bathroom and two walk in closets.


Some Kitchen Refreshes
This customer just wanted the painted over, textured wallpaper removed and the walls repainted. And then a simple subway tile backsplash added. It was a simple way to revitalize the kitchen.


Before...


After...
Similarly, here I just replaced the countertops with butcher block and installed a real subway tile backsplash (the previous one was stick-on)
Before...


After...


A New Office
In this case, the customer wanted to turn the dining room into an office so I rebuilt the portal and installed a nice set of French doors in the opening and voila - an office!
Before...


After...


New Crown Molding


This house didn't come with crown molding, so I installed a nice large classic crown throughout the entire first floor.
Feature wall and crown
This customer designed this feature wall and I had the privilege of building it for them (I also installed the crown moulding on the vaulted ceiling).


Shiplap ceiling with decorative beams
The original bedroom ceiling just had a single beam running down the middle. Installing the shiplap, additional beams, trim, and recessed lights really made this cathedral ceiling grand.


Custom walk-in closet
The customer had a new shower installed, but this left an awkward empty space next to it...


...so, I built a custom closet to match the profile of the shower.


Deck with wrap around step
This deck was old and ready to be replace. In this case, nothing of the old deck was salvageable. So we removed the old deck, build a new foundation, and finished it with composite deck board. The wrap around step and louvered slat privacy wall really made it nice.


New Screened-in Porch
The old screened-in porch was rotting and insect damaged. I demolished the old structure, stripped the paint and patched the concrete slab, and built the new porch.


Doorway installed in wall
In this home, I created a doorway in the wall, so the customer could have easier access to the adjoining room.
Before and after from one side


Before and after from the other
New Sliding Glass Door and Concrete Step
It wasn't enough to simply replace this sliding glass door because the concrete step it sat on was cracked and uneven.


I removed the old door, demolished the old step and re-poured a new step. Then the new door fit beautifully and looked great inside and out.


Handicap ramp rebuilt
Part of this handicap ramp was rotting...

...so I replaced the rotting section

Window and doorway trim
This home was purchased without the trim on the windows and door openings...

...so the customer asked me to install trim in these areas. The new craftsman style trim really warms it up.


